Types of Doors

10 DIFFERENT TYPES OF DOORS FOR YOUR HOUSE

There are huge types of doors and windows which can either be made or are accessible in the market ready to be fixed. Depending on the material of manufacture, some of their sorts alongside their main features, merits and demerits are offered here to encourage simple determination for the house proprietor.
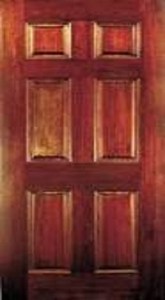
1 Timber Wood

timber-door

Customarily, timber or wood as it is prevalently known has been the mainstay for the manufacture of doors/windows. Its main advantage being its local availability of material and the simplicity with which it can be made by the local craftsmen.

Without further ado wide range of wood are accessible in the market and its choice ought to be made in light of the properties of life span and the financial plan of the owner. In spite of the fact that they can be utilized for all areas as a part of the house, they are best put for exterior areas.Timber is most normally being utilized for making of doors/windows.

2 Battened & Ledged Doors

battened-and-ledged-door

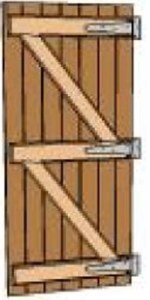
Battened and ledged doors are the easiest type of doors and are being used for ages. Such doors comprise of vertical wooden battens of the stature of the door with around 35 mm thicknesses which are typically tongue and groove joint. Generally, three edges (level individuals) are given, one each at the top and base and one in the center.

Battened and ledged entryways can likewise be either braced or braced and framed to offer strongness and better appearance.Such doors are ordinarily used for toilets, showers, WC and furthermore in houses where the economy is of prime thought.

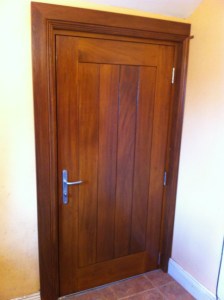
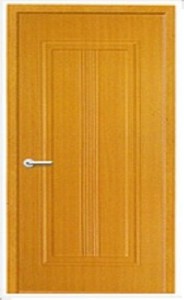
3 Framed & Paneled Doors

framed-and-panneled-door

These kind of doors and windows are most usually used in the houses. The frame for the door is made of wood and the shutter panels with timber, plywood, piece board, hardboard. Various design plans can be made on the boards, in this manner making such door entirely brightening.

The panels can similarly be made out of glass. In situations where part of the door is in wooden panels and the remaining is of glass panels, the door is known as paneled and glazed. Such entryways have a flexible design which can look tastefully satisfying. The plan can be made as per the requirement and area in the house. The door frame for such sorts of doors can be made out of wood itself or of metal segments like steel.

4 Flush Doors

flush-door

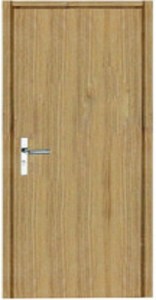
A flush door is a totally smooth door, having plywood or Medium Density Fiberboard over timber frame which is relatively light. The hollow core so acquired is frequently filled with a cardboard core material.

Flush doors are most regularly used in the inside of an abode, despite the fact that with a few varieties they are also utilized as exterior doors in houses.The frames for such doors can be made of wood, steel and so on, which can hold its weight. The doors are generally pivoted along one side to permit the way to open in a single way.Flush doors are generally given in houses nowadays because of the reasons of budget, appearance, solidness and so forth, and are usually accessible in the market.While giving these ways to toilets, showers; the internal face of the door ought to be secured with aluminum sheets to give insurance against water.Frames for such doors/windows can be made in any of the conventional ways.
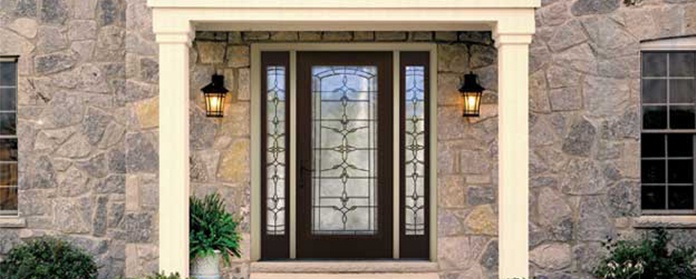
5 Glass Doors

interior-glass-doors

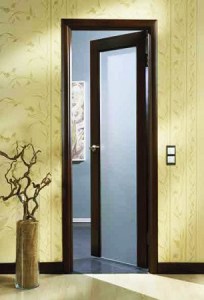
A glass is generally used for doors and windows, for the most in paneling. In any case, if the owner so wants, doors can be made out of glass for particular locations. Regularly such doors are given on the backside of the house as it gives an unobstructed view of the lawn or garden.

Front doors made of glass are similarly lovely, yet care ought to be taken to guarantee both protection and strength. Cut glass panels set into wooden edges are an incessant and wonderful alternative for front doors. Such doors are expensive and require great support.They are normally heavier than other doors other than being expensive.

6 Steel Doors

steel-doors

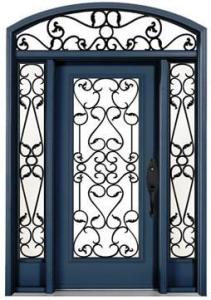
Steel or other such metal construction has been utilized for quite a long time as they are productive and are a durable choice for interior and exterior doors alike. These entryways can be either be hollow or solid.

It has been observed to be a decent substitute for wood and is being utilized widely to make frames. The frames can be made out of points, Tee, channels or pressed steel plates. Holdfasts and hinges are typically welded to the frame if there should arise an occurrence of steel frames.

Normal shutters made out of wood can be fixed on these steel frames.Steel frames are entirely prevalent and are being utilized widely for houses and different areas as they are sparing than the customary wooden frames.Shutters can likewise be made out of Mild Steel (MS) sheets, welded or bolted to a frame of angle iron or channel segment, appropriately supported.Steel doors can likewise be made of high caliber in cold rolled mild steel, precision engineered. They are durable requiring minimum maintenance. They are accessible in wonderful shades with different wood grain finishing.These can constantly be utilized where security is of a more noteworthy concern.

7 PVC Doors

pvc-doors

PVC is a typical term for Poly Vinyl Chloride. It is essentially a plastic material generally utilized for making different items including water tanks, funnels, and fittings for houses. The utilization of PVC for the manufacturing of doors has turned out to be exceptionally famous and a vast assortment of the same are accessible in the market in various designs and colors.

The merits of utilizing PVC doors are that they are termite confirmation, solid, hostile to destructive, lightweight, dampness safe and so forth. They are likewise simple to manufacture and install.In any case, they are not suited for entry doors as they are light in weight, not weatherproof like wooden or metal doors, so they can’t avoid the cruel environmental conditions.Such doors available and can turn out to be more economical when contrasted and wooden doors.

8 Fiberglass Doors

fibreglass-door

Fiberglass is a glass which is drawn into fibrous frame and woven into fabric. It is solid, light and non-combustible and has a high rigidity. Glass strands bonded with resin that can be utilized to wide range of items including bathtubs, door and windows and so on.

Fiberglass is considered to stand out amongst the most hardened materials with generally low maintenance costs as related to wood and steel.Fiberglass doors are relied upon to be steady as they don’t twist, bow or contort. They are froth filled and offer great insulation properties.They can likewise be painted according to design.Doors and windows made out of fiberglass can be given wooden panels at first glance to enhance the feel. Entryways made out of fiberglass can be utilized for both outside and inside areas. The outside entryways have originator alternatives, for example, angled glass and entryway stiles.These doors are accessible in the market to coordinate any design style.

9 Fiber Reinforced Plastic Doors

frp-door

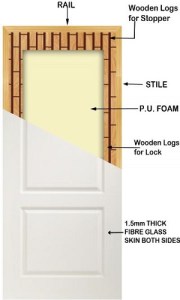
Fiber Reinforced Plastics famously known as FRP is a general term relating with the fortification of plastic with fibrous glass. Because of its high quality it can be put to numerous utilizations including manufacturing of doors. Normally, the elasticity is around ten times that of PVC. FRP formed doors are accessible in numerous colors and finishes incorporating normal wood finish in the market. The standard door thicknesses are 30/35 mm and are accessible with fire retardant properties.

These doors can likewise have two leaves of 1.5 mm thickness. The leaves are shaped over a core material framing a sandwich board.Essential wooden supports are accommodated for fixing the handles, locks, stoppers and other accessories. FRP doors are in huge demand nowadays for use in modern houses.

10 Aluminium Doors

aluminum-doors

Aluminum is a metal which has been put to huge number of applications due to being light in weight. An extensive number of items made out of aluminum are accessible in the market including doors, windows, partitions and much more.

Aluminum frames for doors and windows have the advantage of resisting tough weather conditions. Being light in weight they exchange less loads to the base. Aluminum frames are not influenced by termites and all things considered they are longer enduring.Doors and windows made out of aluminum can be side hung or sliding and are reasonable for outside or inside areas.Stylishly they are very satisfying and are entirely practical over the long haul.
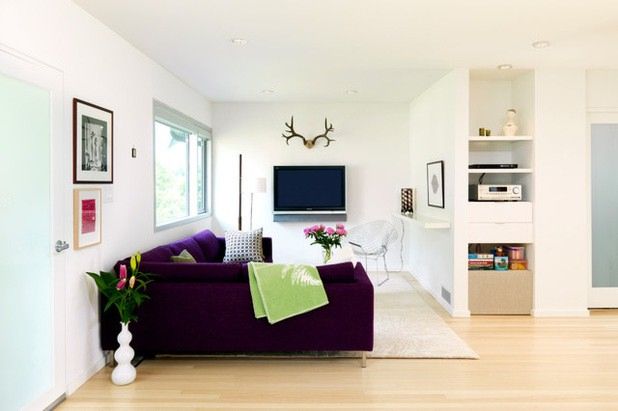
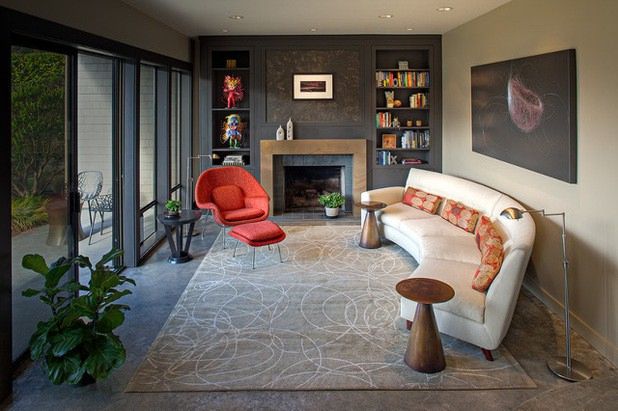
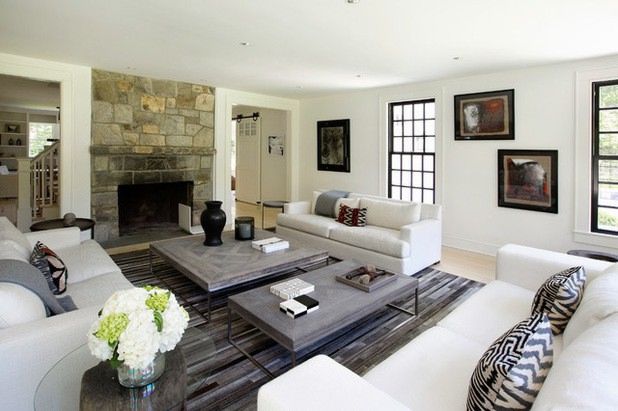
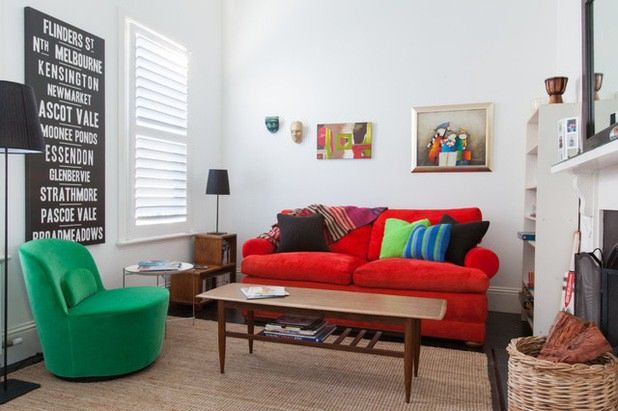
living-room-furniture-sets

Top 14 Key Measurements for Designing the Living Room

Whether you are laying out a living room for your first flat or arranging one for your new personalized home, understanding the size of furniture and its relationship to the room can help you make a comfortable and functional space. The main thing to remember is that you need the proportions of the furniture to arrange with the proportions of the room. Small scale furniture can be pretty much as comfortable as overstuffed upholstery if you shop shrewdly. A rule of thumb is to purchase the most affordable and astounding quality things you utilize very frequently, and spare cash on things you don’t use much.

11.A Single Couch

This customized tight-back contemporary couch keeps this little living room flawless. Sofas are used very frequently in common families. Get a decent one with the goal that it holds up, feels good and keeps up its looks. Overall couches are around 84 inches (213 cm) in length and 38 in. (98 cm) depth. Try to find a couch that is 72 in. (183 cm) long for a modest apartment & spare the 96-in. (244-cm) overstuffed one for the farm house.

2

This outline demonstrates a few bits of furniture normally found in a living room. Your prerequisites will differ, however the standards are the same. You need the room to flow around the furniture for circulation, & furthermore have clear ways to the seating areas & exit points. Circulation ways require 30 to 36 in. (77 to 91 cm) of clear width. You can put espresso or drink tables near to 12 in. (30 cm) from the edge of the seating. Different furniture may require no less than 24 in. (61 cm) between pieces for individuals to effectively move around. Another essential thought is the conversation arc. Put furniture in a manner that individuals can listen to each other without much of a stretch when seated. Eight feet (244 cm) is perfect; bigger rooms may be broken into seating bunches.

3

2.A Sectional

The cousin to the couch is the sectional, as found in this small scale room. Sectionals more often occupy more space, yet when set carefully, they can be extremely comfortable. See how the rich shade of this sectional anchors the generally ethereal plan. The modern metal seat set in the opposite side is an additional seat for when a company drops by. Basically made up of two couches put opposite to each other, sectionals include a lot of seating so that other upholstered furniture isn’t required. Similarly as with couches, sectionals come in different sizes. Two 84-in. (213-cm) sectional sorts out need a space that is 7 feet (213 cm) wide and 10 feet (305 cm) long, which is generally a huge partition of a room.

4

In moderate design this bended contemporary sofa transforms into itself, making its own particular conversation arc. Couches like this one, and other formed couches, ordinarily consume up more room than normal. This case is around 11 feet (335 cm) long and needs a total depth of around 54 in. (137 cm). The pleasantly adjusted furniture situation supplements the off-center fireplace.

5

3.Multiple Sofas

Whenever space and budget allow, a few couches can be masterminded around oversize cocktail tables, as has been done in this transitional space. See that the square table is focused between the two couches facing each other, while the narrow table serves the couch opposite the stone fireplace. Despite the fact that this space breaks out of the 8-foot conversation arc, every couch is its own seating bunch. The lower roof looks after closeness, and a generous flow space around the room keeps every couch’s seating zone adequately private. A room should be no less than 20 feet (610 cm) square for a course of action this way.

6

4.Love Seats

When you require some additional seats and you simply don’t have space for a couch, consider a love seat. Love seats are generally around 5 feet (152 cm) long. The depth fluctuates relying upon the style. You can combine one with a couch in the same plan or set only it, as has been done in this room.

7

5.Lounge Chairs

Lounge chairs typically swivel, rock and lean back, so they require additional space. See that this beige leather lounger sits far from the wall in order to work as proposed. When you consolidate it with a ottoman, you will need to consider the ottoman’s impression and additional space for somebody to stroll around both pieces easily.

8

6.Chairs

Two arrangements of chairs offers a seating in this expansive room, alongside a couch. You will see that the seats in the forefront are put with the goal that you value their sculptural form thus the view into the room is kept up. The upholstered seats sit at the back, since they are bigger and take up more pace. One can easily move around the exemplary twisted plywood Eames seats here.

9

7.Stools and Benches

When you need a brightening touch, consider putting stools and benches in your design. Stools might be 16 to 20 in. (41 to 51 cm) square; seats are around 14 to 18 in. (36 to 46 cm) deep and 36 to 60 in. (91 to 152 cm) long. In this living room, two sublimely detailed stools finish a keenly eclectic space with extraordinary artfulness.

10

8.Cocktail and Coffee Tables

 Cocktail and coffee tables regularly are central focuses, since they have a place in the center point of a room. Not just will you need them to look great, yet you will likewise need them to function well. Round and oval-shaped ones can be easier to move around, yet squares and rectangles will give you more surface area.

12

9.Televisions

Formal family rooms are often saved to entertain visitors; in any case, a few people have only one living room and will need to put a TV in it. Since TVs now arrive in a wide range of sizes, planning furniture for them relies on upon which TV is picked and how it’s used. Considering that the normal screen today is 42 to 50 in. (107 to 127 cm), you will need to keep your seating near 10 feet (305 cm) of it. Likewise, deliberately consider the height. Having the screen set 15 to 20 in. (38 to 51 cm) above the floor has dependably worked, however mounting it over a fireplace is turning out to be more regular, as has been done in this room. In such cases, the screen will be 48 to 60 in. (122 to 152 cm) above the floor, and you will look upward from your seating area to see it. It is best to put a TV out of a circulation course with the goal that individuals don’t as often as possible stroll before the set.

13

10.Sofa Tables

Bigger spaces can oblige sofa tables, as in this formal living room. Most sofa tables are 14 to 20 in. (36 to 51 cm) deep and 60 to 72 in. (152 to 183 cm) long. These are awesome for putting lights upon and for offering balance to couches that buoy in a room. Remember that you should hide electrical lines under carpets or have floor outlets for the lights.

You will see that this space has two seating groups and an assortment of furniture shapes and sizes. The pattern has been to coordinate in sets yet not to have every table from the same line of furniture.

14

11.Floor Lamps

Bear in mind about floor lights. Maybe a couple of them will enlighten a room uniformly. They likewise arrive in an incredible range of sizes, and you will need to discover one that coordinates with the interior of your room and that supplements the size of your design. Get ready for a space that is no less than 10 to 12 in. (25 to 31 cm) in distance across and 54 to 84 in. (137 to 213 cm) in height.

15

12.End Tables

With regards to end tables, consider a blend of scales and finishes. This room has an additional punch of enthusiasm from the metal and glass tables, which measure around 18 in. (46 cm) in distance across. Square and rectangular tables ordinarily run from 20 to 30 in. (51 to 76 cm) in either course. On the off chance that they are to hold table lights, be sure that they are sufficiently huge for the size of light that you pick and that they permit different things to be set around them (for instance, coasters for drinking glasses).

16

13.Pianos

Though pianos are less common than in the past, there is nothing like having a baby grand to make a living room feel more complete. If you don’t know how to play one, you can get the type that plays electronically. If you entertain lavishly or want to have lots of fun at your parties, this is the ticket. The smallest grand pianos are about 60 in. (152 cm) wide and 60 in. (60 cm) long. Larger ones are around 72 in. (183 cm) long. Allow for a bench that is about 20 in. (51 cm) wide and 42 in. (107 cm) long as well. Based on these dimensions, it is wise to allow a clear floor space that’s at least 7 feet (213 cm) wide and 10 feet (305 cm) long to accommodate a grand piano.

17

14.Artwork

Before committing to all of the furnishings that you wish to place in your living room, think about your artwork. Large paintings need generous wall space and ideally should be displayed farther from the entry points so that they can be seen by someone entering a room. A good tip is to hang them low enough so that the top is just above eye level. Sculptures as well need their own space and should be placed so that they can be viewed enjoyably. Allow floor space in proportion to the size of the sculpture. Pedestals should not be more than 16 in. (41 cm) in diameter, or should be square and have dimensions relative to the scale of the sculpture.


iron making

Reinforcement Manufacturing Process (Guide)

Reinforcement Manufacturing Process:

Iron Making

Iron making through BF and DRI course utilizing virgin iron metal bumps and fines mined through environment well-disposed procedures.

Steel Making

State-of-the-art steel making technology using Blast Furnace(BF) + Direct-Reduced Iron(DRI) – Electric Arc Furnace(EAF) – Ladle Refining Furnace(LRF) – Continuous Casting Machine route producing clean steel billet, with very low levels of Sulphur and phosphorous (less than 0.035%) and very low levels of inclusion and tramp elements.

one

Manufacturing Process Chart

two

Steel Bar

Steel Rolling:

World’s most developed Morgan Rolling Mill sending HYQST innovation, to create TMT of reliably fantastic completed with programmed cutting and pressing.

  • Digital Furnace Reheating:

Walking Beam Type Digital Furnace, which guarantees uniform warming yet guarantees less fuel utilization.

  • Secondary Descaler:

To ensure scale free rolling using high pressure jets at 230 bar.

  • Rolling (In Closed Boxes):

12m long insulated roller table, which guarantees rolling at a gap of 5 sec. Transports the handled segments, as a free bar, from Breakdown Mill to Continuous Mill. Minimizes temperature misfortune from head and last part. Protected spread holds billet segment’s temperature.

  • No Twist Mill:

Constant Rolling through alternate V-H Mill, which guarantees a more prominent rate. Mill Train for appropriate rolling of completed segments. Bed assembly includes V-H bed assembly.

  • HYQST Controlled Quenching & Tempering:

Thermo-Mechanically Treated (TMT) Rebar’s include a blend of plastic deformation of steel in austenitic stage took after by extinguishing and further self-hardening in 90m long cooling bed.

Quenching:

The hot rolled bar leaves the finishing plant stand at 1050° Celsius which is quickly quenched in a water box. This is a chamber where water is made to encroach on the surface of the rebar at high pressure by split style spout with microchip based controlled cooling process. The quenching changes over the TMT’s surface layer to marten site and makes it shrink. The shrinkage pressurizes the center shaping the right precious stone structures, while the center stays hot and austenitic.

Self-Tempering:

The bar leaves the quench box with a temperature gradient through its cross-area, and as the bar cools, heat streams from the bar’s inside to its surface so that the bar’s warmth and pressure accurately tempers a transitional ring of marten site and bainite.

Atmospheric Cooling:

At last, the moderate cooling subsequent to quenching consequently tempers the austenitic center to ferrite and pearlite on the cooling bed, which now has a solid and intense, tempered marten site at first glance layer of the bar: a middle layer of extreme marten site and bainite and a refined, pliable ferrite and pearlite center.

material handling system

Material Handling System & Equipment

Material handling equipment is mechanical hardware utilized for the development, stockpiling, control and security of materials, merchandise and items all through the way toward assembling, circulation, utilization and transfer.

Design of Material Handling Systems:

A typical way to deal with the configuration of MH frameworks (MHSs) is to consider MH as an expense to be minimized. This methodology might be the most proper by and large in light of the fact that, while MH can increase the value of an item, it is normally hard to distinguish and evaluate the advantages connected with MH; it is much less demanding to recognize and measure the expenses of MH (e.g., the expense of MH hardware, the expense of aberrant MH work, and so forth.). Once the outline of a creation procedure (restrictive of MH contemplations) is finished, substitute MHS plans are created, each of which fulfills the MH necessities of the generation procedure. The minimum cost MHS outline is then chosen. Different types of material handling equipment:

  1. Transport Equipment
  •   Cranes
  •  Conveyors
  •  Truck loading
  •  Industrial trucks
  •  Rail loading
  •  Bagging
  •  Ship loading
  1. Positioning Equipment
  2. Unit Load Formation Equipment
  3. Storage Equipment
  • Covered/open stockpiles
  • Open silos

Material Handling System Conveyer and Stacker :

Conveyors:

Conveyors are utilized when material is to be moved every now and then between particular focuses over an altered way and when there is an adequate stream volume to justify the fixed conveyor investment. Diverse sorts of conveyors can be described by the kind of item being taken care of: unit load or mass load; the conveyor’s area: in-floor, on-floor, or overhead, and regardless of whether burdens can collect on the conveyor. Amassing permits discontinuous development of every unit of material transported along the transport, while all units move at the same time on conveyors without collection capacity. For instance, while both the roller and level belt are unit-load on-floor conveyors, the roller gives amassing ability while the level belt does not; comparably, both the force without and trolley are unit-stack overhead conveyors, with the force sans and intended to incorporate an additional track so as to give the collection capacity ailing in the trolley conveyor. Instances of bulk-handling conveyors incorporate the attractive belt, troughed-belt, pail, and screw transports. A sortation conveyor system is utilized for consolidating, recognizing, enlisting, and isolating items to be passed on to particular goals, and normally comprises of level belt, roller, and chute conveyor fragments together with different moveable arms and/or pop-up haggles that redirect, push, or draw items to various goals.

w

Belt Coal Handling System

e

Coal Handling System

Stacker:

Stacker is a substantial machine utilized as a part of mass material taking care of. Its capacity is to heap mass material, for example, limestone, minerals and oats on to a stockpile. A recovered can be utilized to recoup the material.

Stackers are ostensibly appraised for limit in tons every hour (tph). They regularly go on a rail between stockpiles in the stockyard. A stacker can for the most part move in no less than two bearings: evenly along the rail and vertically by luffing (raising and bringing down) its blast. Luffing of the blast minimizes dust by lessening the separation that material, for example, coal needs to tumble to the highest point of the stockpile. The blast is luffed upwards as the stature of the stockpile increments. A few stackers can turn the blast. This permits a solitary stacker to shape two stockpiles, one on either side of the transport.

Stackers are utilized to stack in various examples, for example, cone stacking and chevron stacking. Stacking in a solitary cone tends to bring about size isolation, with coarser material moving out towards the base. In crude cone handle stacking, extra cones are added by the principal cone. In chevron stacking, the stacker goes along the length of the stockpile including endless supply of material.

Stackers and Reclaimers were initially physically controlled, without any method for remote control. Advanced machines are commonly self-loader or completely computerized, with parameters remotely set. The control framework utilized is commonly a programmable rationale controller, with a human-machine interface for showcase, associated with a focal control framework.

Other than stacking, a stacker has three essential developments:

  • Luffing:This is vertical development. Stackers utilize either a winch component with metal wire, or water powered barrels, for the most part two. Winch systems are profoundly solid contrasted with pressure driven actuators and remain generally utilized, especially in expansive stackers.
  • Travelling: The stacker proceeds onward a rail track, which might be wide or slender gage, empowering it to move around the stockyard as required. For this reason, footing engines controlled by direct present (DC) are associated by incline apparatuses to somewhere around 12 and 22 wheels. For manual control, every one of the controls are in a controller’s lodge over the blast transport or blast. Cutting edge stackers can be controlled remotely.
  • Slewing: This is turn of the stacker around its focal hub to adjust or put the stockpile where required. This works for the most part by a huge number pinion that pivots around a large number base. This kind of apparatus get together is known as a sun and planet gear. The axles might be different and are driven by DC-fueled hub engines which transmit the torque by means of incline or helical apparatuses.

r

t

y

Residential Space Planning

Steps for Residential Space Planning

Residential Space planning is about the organizing the interior space for providing clients with very efficient & commercially helpful use of a building`s layout. We know how space should be used & develop spatial provision that go ahead the schedule of accommodation to achieve a creative & proficient configuration.

Evaluating the client`s needs

  1. An effective design satisfactorily accommodates within a structure the lifestyle & specific requirements of the user.
  2. Determine detailed needs of the client
  • Prepare a list that includes design concerns and needs
    • Family size & structure
    • Family or individuals interests & activities
    • Location of site
    • Number of levels
    • Budget of project
    • Zoning ordinances and covenants
    • Architecture style

Levels

  1. One story homes are usually compatible with a limited number of architectural styles and have the prospective to be more costly if located on a larger site.
  2. One & one-half story homes utilize the attic as a living space through structural elements including a steep roof and dormers projecting from the roof to let in air and light.
  3. Two story homes are inexpensive to build since of smaller roof & foundation area.
  4. Split-level homes are developed for a sloping lot, & separate sleeping, living, & recreation on different levels.

Traffic patterns

  1. Are a primary consideration in designing a functional plan.
  1. Main traffic areas include the halls, stairs, foyers, entrances to rooms & exterior entrances.
  1. Travel should be short and if possible not pass through other rooms.
  2. Trace various routes through the house to examine traffic flow.
expensive homes

Top 10 Most Expensive Homes (2016)

“A house is the most valuable asset in one`s life, where everyone manages a perfect mix of safety and comfort for their loved ones. Though,fore those who can afford beautiful & luxurious houses, their houses are a reflection of their personal style and taste. As money is not a very big issue for them, they spend millions on building their houses unique & extraordinary.

Here is The List of Top 10 Most Expensive Homes in India 2016:

  1. NCPA Apartments, Mumbai

NCPA Apartments in Mumbai is located in high-class area of Nariman Point, and makes a very posh housing option in India. One would need to shell out an inflated price of Rs 29-35 crore, to possess a 4 bedroom apartment here.

  1. Gautam Singhania Residence, JK House, Mumbai

gautam-singhania-residence-jk-house-mumbai

JK House at Breach Kandy in Mumbai is absolutely, one of the costliest and most luxurious houses, which belongs to Gautam Singhania. It also has some astonishing facilities such as a museum, a helipad & a health center. The house has total 30 floors, out of which 6 are kept back for only parking.

  1. Vijay Mallya Residence, White House in the Sky, UB City Bangalore

vijay-mallya-residence-white-house-in-the-sky-ub-city-bangalore

Vijay Mallya, the ostentatious business magnate, who owns Kingfisher Airlines in addition to UB Group, possesses a luxurious house, which he calls “White House in the Sky”. This luxurious mansion style home has been built in UB City & is worth well over Rs 100 crore.

  1. Shashi Ruia & Ravi Ruia Residence, New Delhi

The Chairman of Essar Group, Shashi Ruia & the Vice Chairman, Ravi Ruia owns one of the most luxurious bunglows in India. This house is located on the well-known Tees January Marg & is worth a huge Rs 120 crore.

  1. Rana Kapoor Residence, Tony Altamount Road, Mumbai

The CEO of Yes Bank, Rana Kapoor, has of late acquired a luxurious house situated at Tony Altamount Road. This building, which was earlier possessed by Citi Group, was recently acquired by Kapoor, by paying a huge sum of Rs 120 crore.

  1. Naveen Jindal Residence, Delhi

Next is the stunning house of industrialist-politician Naveen Jindal, which is situated in one of the most expensive vicinities of the city, the Leafy Lutyens Bungalow Zone in Delhi. This house is prized around Rs 125-150 crore.

  1. Ratan Tata Residence, Colaba, Mumbai

Presenting next on the list is the splendid bungalow of businessman Ratan Tata, which has worth Rs 125-150 crore. The three storied grand house shields an area of 15000 sq feet & has several outstanding facilities.

  1. Shahrukh Khan Residence, Mannat, Mumbai

The beautiful house of Bollywood super star, Mannat, is considered as one of the most lavish homes in the nation. It is located in the Bandra area of Mumbai & is valued at Rs 125-150 crore. The house lives up to the reputation of the super star.

  1. Anil Ambani Residence, Abode, Mumbai

anil-ambani-residence

Making it to the top of this list, the Ambani brothers, with Anil Ambani having a home called Abode constructed, which is computed to touch a cost of Rs 5000 crore & even more.

  1. Mukesh Ambani Residence, Antila, Mumbai

mukesh-ambani-residence

Antila, the residence of Mukesh Ambani, is on the top of this list with its worth reaching an implausible Rs 10000 crore. Having an area of 400000 sq foot, Antila is no less than a landmark in Mumbai & has all modern amenities, which are even hard to imagine.

Furthermore, many expensive & beautiful houses are owned by the famous & rich people in India. These people consist of politicians, film stars & well-known sportspersons, who don’t mind expending millions on their homes.

amazing bridges in india

Top 10 amzing bridges in India

  1. Naini Setu

    Located: Across Yamuna River, near Allahabad

    Opened: 1865
    c1

    One of  the longest & oldest bridges that pass through the Yamuna, the Naini Setu boasts of both road & rail compatibility. Upper deck has two-lane railway line & lower deck has road line working ever since 1927.

  2. Narmada Setu

    Located: Across Narmada River, near Bharuch

    Opened: 1881

    c2

    Also recognised as the Golden bridge, Britishers built this linkage to join to the main city Bombay (Now Mumbai) for all dealing purposes.

  3. Godavari Setu

    Located: Across the Godavari river, near Rajahmundry

    Opened: 1900

    c3

    Also known as Havelock Bridge, this old bridge is presently used to transport civic provisions whilst waiting to be acknowledged as a monument. It is one of the longest bridges connecting the then Howrah and Madras.

  4. Pamban Setu

    Located: Across the Palk strait, near Rameshwaram

    Opened: 1913

    c4

    The first sea bridge & also one of the longest in its type, this bridge connects the historical Rameshwaram to the mainland. It has double leaf bascule section midway for ships and barges to pass through.

  5. Rabindra Setu

    Located: Across the Hooghly River
    Opened: 1943

    c5

    Also known as Howrah Bridge, Kolkata’s iconic landmarks, carries the weight of 150,000 walkers and 100,000 automobiles on a regular basis. It could be the busiest cantilever bridge in the world.

  6. Saraighat Setu

    Located: Across the Brahmaputra River, near Saraighat

    Opened: 1962

    c6

    It’s the first rail-cum-road bridge crossways the Brahmaputra river. Inaugurated by Prime Minister Jawarlal Nehru, this bridge has been productively joining North East to the rest of the country for more than 50 years.

  7. Mahatma Gandhi Setu

    Located: Across the Ganges river, Patna

    Opened: 1982

    c7

    It is one of the longest river bridges crossing the divine river of Ganges in India. This rail-cum-road bridge was inaugurated by the then Prime Minister Indira Gandhi.

  8. Vidyasagar Setu

    Located: Across the Hooghly River, Kolkata

    Opened: 1992

    c8

    Known as the second Hooghly Bridge, this is the other iconic bridge of West Bengal, which is also the longest cable-stayed bridge in India.

  9. Vikramshila Setu

    Located: Across the Ganges, near Bhagalpur

    Opened: 2001

    c9

    It is the thridrd longest bridge on water in India and joins two National Highways (NH-31 and NH-80). It is also only a road bridge with pedestrian footpaths at the boundaries.

  10. Rajiv Gandhi Sea Link

    Located: Across Mahim Bay, Near Bandra (Mumbai)

    Opened: 2009

    c10

    Also recognised as the Bandra-Worli Sea link, this bridge is the lengthiest over-the-sea link in India. This was mostly constructed to decrease the traffic bottleneck between these points in Mumbai.


Know more about us: www.struccore.com


earthquake-protectection-measures

EARTHQUAKE PROTECTION MEASURES FOR BUILDINGS

The requisite to increase the capacity of an existing building as per safety policy for earthquake proof buildings, to survive against the seismic forces rises typically from the indication of the caused damage & bad performance during an earthquake. It can also arise from computations or by evaluations with some similar buildings that have been damaged at other spots. In the first case, the landlord can be relatively convinced easily for taking up some earthquake protection actions, for improving the strength of the building. Whereas in the second case residents that have much more stringent day-to-day needs are generally hesitant to spend money for improvement of seismic safety as a part of earthquake preparedness.

The hurdles during repairs, restoration & seismic strengthening of buildings are concisely listed below:

(i) Before the occurrence of a likely earthquake, the essential strengthening of seismically weak buildings is to be identified by a survey & examination of the structures.

(ii) Just after a destructive earthquake, emergency repairs & temporary supports are to be conceded so that hazardously standing buildings may not fall during aftershocks & the less damaged ones could be quickly brought back into routine.

(iii) The actual repair & strengthening difficulties are faced at the stage once things start settling down, after the earthquake. At this stage difference has to be made in the type of action required, that is, repairs, restoration & strengthening, since the cost, time & skill required for them may differ.

Strengthening of existing masonry (Small cracks)

one1

Large cracks & crushed concrete

two2

Strengthening RC Members

three3 four4

Strengthening an arched opening in masonry wall

five5

Strengthening with wire mesh & mortar

six6

Strengthening of Foundations

seven7

Connection of new and old brick walls (T-junction) & Connection of new brick wall with existing stone wall

eight8


autocad command shortcut key list

AutoCAD Command Shortcut Key list

AutoCAD commands List are sometimes long winded & hard to type particularly if they are being used over and over again. As such command shortcuts keys they have been a part of the software for some time now.

Sadly many users do not make use of them, as they are not aware of them. The table below shows some of the Shortcuts, to help you out work faster, saving your time:

BLOCKS

SHORTCUT Key COMMAND COMMENT
ATT ATTDEF Opens attribute definition dialogue box
ATTEDIT ATTEDIT Edit attribute values for a specific block
B BLOCK Opens block dialogue box in order to make a block
BATTMAN BATTMAN Opens block attribute manager
BATTORDER BATTORDER Displays attribute order dialogue box
BC BCLOSE Closes the block editor
BCOUNT BCOUNT Counts the blocks in a drawing
BE BEDIT Opens the edit block definition dialogue box
EATTEXT EATTEXT Enhanced attribute extraction wizard to count blocks
GATTE GATTE Global attribute edit of multiple blocks
I INSERT Opens insert dialogue to insert a block
-I INSERT Insert a block by name
MINSERT MINSERT Insert block in rectangular array
REFEDIT REFEDIT Edit a block reference in place
REN RENAME Opens rename dialogue box to rename blocks, layers, etc
W WBLOCK Write a block – for use in other drawings
XLIST XLIST Lists type/block name/layer name/color/linetype of a
nested object in a block or an xref

TIPS

  1. Create a new block on layer 0 so that the block will use the layer and properties of the current layer it is inserted on. Text can be set to colour white.
  2. Set ATTDIA to 1 to use dialog box with block attributes or 0 to use command line.
  3. AutoCAD 2006 allows you to change the insertion point on the fly. INSERT and select BASEPOINT. This allows you to pick anywhere in the drawing (and anywhere in the block you are inserting) as your new insertion point (basepoint).

COMMON AUTOCAD COMMANDS & SHORTCUT KEY LIST

SHORTCUT COMMAND COMMENT
A ARC Draw an arc
AL ALIGN Align an object with another
AP APPLOAD Opens application load dialogue box
AR ARRAY Opens array dialogue box
AUDIT AUDIT Audit drawing for errors
AV DSVIEWER Opens ariel view of drawing
B BLOCK Opens block dialogue box
C CIRCLE Draw a circle
CO COPY Copy an object
CHA CHAMFER Chamfer between 2 non-parallel lines
COL COLOR Opens select color dialogue box
CUI Opens customise user interface dialogue
D DIMSTYLE Opens dimstyle manager
DC ADCENTER Opens designcenter
DI DIST Check a distance
DIV DIVIDE Inserts point node a set division
DO DONUT Draw a solid donut shape
DV DVIEW Perspective view
E ERASE Erase a selection
EX EXTEND Extend a selection
F FILLET Draw an arc between 2 intersecting lines
FI FILTER Opens filter dialogue box
FLATTEN FLATTEN Converts 3D to 2D
G GROUP Launches the group dialogue box
H HATCH Opens hatch and gradient dialogue box
I INSERT Insert a block
IM IMAGE Launches image manager
J JOIN Joins 2 objects to form single object
JPGOUT JPGOUT Creates a JPEG file of current drawing
L LINE Draw a line
LA LAYER Opens layer manager
LE QLEADER Draw a leader line (may need to adjust settings)
LEAD LEADER Leader line with annotation
LI or LS LIST Display information about objects in a text window
LO -LAYOUT Creates a new layout tab
LTS LTScale Change the linetype scale
M MOVE Move a selection
MA MATCHPROPERTIES Match properties of an object
ME MEASURE Inserts point node at input distance
O OFFSET Offset a selection
OP OPTIONS Launches options dialogue box
P PAN Pan in drawing
PE POLYEDIT Edit a polyline
PL PLINE Draw a polyline
PLOT PLOT Opens plot/print dialogue box
PO POINT Point marker or node – DDPTYPE to change pointstyle
PR PROPERTIES Opens properties dialogue box
PRE PREVIEW Preview a plot
PU PURGE Opens purge dialogue box to remove unused elements
RE REGEN Regenerate the display
REC RECTANG Draw a rectangle
REN RENAME Opens rename dialogue box to rename blocks, layers, etc
RO ROTATE Rotate a selection
SP SPELL Spell check a selection – ALL to check entire drawing
T MTEXT Insert multiline text
TB TABLE Opens insert a table dialogue box
TP TOOLPALETTES Displays toolpalette
TR TRIM Trim a selection
U UNDO Undo last command
UN UNITS Opens units dialogue box
V VIEW Opens view dialogue box
W WBLOCK Write a block
CAD _003
WHOHAS WHOHAS Displays who has a drawing open
X EXPLODE Explode a selection
XR XREF Opens x-reference manager
Z ZOOM Zoom in display – A=All, E=EXTENTS, W=WINDOW

AUTOCAD SHORTCUT LIST USING CONTROL KEYS

CTRL+0 CLEANSCREEN Turns user interface elements on/off
CTRL+1 PROPERTIES Turns properties on/off
CTRL+2 ADCENTER Turns design center on/off
CTRL+3 TOOLPALETTES Turns tool palettes window on/off
CTRL+8 QUICKCALC Launches calculator window
CTRL+A Select all
CTRL+C COPYCLIP Copies objects to clipboard
CTRL+H Turns a group on or off
CTRL+J Repeats last command
CTRL+N NEW Opens create new drawing dialogue box
CTRL+O OPEN Opens the select file dialogue box
CTRL+P PLOT Opens the plot dialogue box
CTRL+R CVPORT Switches between viewports
CTRL+S QSAVE Opens the save drawing as dialogue box
CTRL+SHIFT+ Save as
S
CTRL+V PASTECLIP Pastes data from clipboard to drawing
CTRL+X CUTCLIP Removes select object from drawing to clipboard
CTRL+Y REDO Performs the operation ccanceledby UNDO
CTRL+Z UNDO Undoes the last operation
CTRL+TAB Switches between open drawings
CTRL+PAGE Switch up between layout tabs
UP
CTRL+PAGE Switch down between layout tabs
DOWN
ARROW Recall last command
UP/Down

COORDINATE ENTRY

#X,Y Location measured by distance from 0,0 in current UCS
@X,Y Location measured by distance from last point
#distance<angle Location measured by distance and angle from 0,0 in current UCS
@distance<angl Location measured by distance and angle from last point
e
.x or.y or .xy etc Location by extracting and combining coordinate values from 2 or 3 points
distance Location direct from current position in direction of movement
<angle An angle override from current point

DIMENSIONING

SHORTCUT COMMAND COMMENT
CTRL+8 QUICKCALC Displays the calculator
D DIMSTYLE Opens dimension style manager dialogue box
DAL DIMALIGNED Aligned linear dimension line
DAN DIMANGULAR Angular dimension line
DAR DIMARC Arc length dimension
DBA DIMBASELINE Ordinate dimension from baseline of previous dimension
DCO DIMCONTINUE Ordinate dimension from 2nd extension line of previous
dimension
DDI DIMDIAMETER Diameter dimension for circles and arcs
DED DIMEDIT Edit dimension text on dimension objects
DI DIST Check a distance
DIMCENTER DIMCENTER Creates center mark
DLI DIMLINEAR Linear dimension
DOR DIMORDINATE Ordinate point dimension
DOV DIMOVERRIDE Override dimension style
DRA DIMRADIUS Radial dimension for circles and arcs
ID ID Display the co-ordinate values of a point
UN UNITS Opens drawing  units dialogue box

DRAWING OBJECTS

SHORTCUT COMMAND COMMENT
A ARC Draw an arc with 3 points
B BLOCK Opens block dialogue box in order to make a block
BO BOUNDARY Draw a boundary
C CIRCLE Draw a circle
DO DONUT Draw a solid donut shape
DT TEXT Single line text
DIV DIVIDE Inserts point node a set division
EL ELLIPSE Draw an ellipse
F FILLET Draw an arc between 2 intersecting lines
G GROUP Opens object grouping dialogue
H HATCH Opens hatch and gradient dialogue box
L LINE Draw a line
LE QLEADER Draw a leader line (may need to adjust settings)
LEAD LEADER Leader line with annotation
ML MLINE Draw multilines
O OFFSET Offset an object by distance
PL PLINE Draw a polyline – a complex line
PO POINT Point marker or node – DDPTYPE to change pointstyle
POL POLYGON Draw a regular polygon 3 to 1024 sides
RAY RAY Construction line in one direction
REC RECTANG Draw a rectangle
REG REGION Region – for shading for example
REVCLOUD REVCLOUD Revision cloud – note can select a polyline
SPL SPLINE Spline or smooth curve along points
T MTEXT Multi-line text
WIPEOUT WIPEOUT Masks part of drawing for clarity
XL XLINE Construction line of infinite length

TIP

  1. Use PO to create node point – if you do not see anything try changing the node properties DDPTYPE.
  1. Alternatively set PDMODE to 3 to display an X at id point set PDMODE to 0 to clear.

EXTERNAL REFERENCE – XREF

SHORTCUT COMMAND COMMENT
REFEDIT REFEDIT Edit an external reference in place
XA XATTACH Opens select reference file dialogue for attaching Xref
XB XBIND Opens Xbind dialogue – allows import only of symbols etc
XC XCLIP Create a border in an xref to hide outside area
XOPEN XOPEN Opens a selected xref in a new window
XR XREF Opens Xref manager dialogue box

TIP

  1. Using RELATIVE PATH to find the Xref file relative to the existing location can be a benefit if files are moved between locations or sent to others.
  1. OVERLAID should be used in place of ATTACH if 2 drawings share a common Xref, eg a mechanical drawing could be overlaid an electrical drawing to prevent the building outline appearing twice.

NOTES

  1. If a drawing has an Xref, the status bar will show the Manage Xref icon.

FORMATTING

SHORTCUT COMMAND COMMENT
AP APPLOAD Opens application load dialogue box
BE BEDIT Opens the edit block definition dialogue box
BH BHATCH Opens hatch and gradient dialogue box
CUI Opens customise user interface dialogue
D DIMSTYLE Opens dimension style manager dialogue box
DC ADCENTER Opens designcenter
DDPTYPE DDPTYPE Opens point style dialogue box
LA LAYER Opens layer manager
LT DDLTYPE Opens line type manager
LTS LTSCALE Change the linetype scale
LW LWEIGHT Opens line weight settings dialogue box
MA MATCHPROPERTIES Match properties of an object
OP OPTIONS Launches options dialogue box
OS DDOSNAP Opens drafting settings object snap dialogue
PR DDCHPROP Opens properties dialogue box
SSM SHEETSET Opens sheet set manager palette
ST DDSTYLE Opens text style dialogue box
TP TOOLPALETTES Displays toolpalette
TS TABLESTYLE Opens table style dialogue box

FUNCTION KEYS

SHORTCUT COMMAND COMMENT
F1 HELP Opens Autocad help
F2 TEXTSCR Switches between text screen and graphics area
GRAPHSCR
F3 OSNAP Switches osnap on/off
F5 or CTRL+E ISOPLANE Cycles through isoplanes
F6 or CTRL+D COORDS Turns coordinate display on/off
F7 or CTRL+G GRID Turns grid on/off
F8 or CTRL+L ORTHO Turns ortho on/off
F9 or CTRL+B SNAP Turns snap on/off
F10 or CTRL+U POLAR Turns polar on/off
F11 or OSNAP TRACK Turns object snap tracking on/off
CTRL+W
F12 DYNMODE Turns dynamic input on/off

INQUIRY

SHORTCUT COMMAND COMMENT
AA AREA Calculate the area
DI DIST Calculate a distance and angle
DDPTYPE DDPTYPE Opens point style dialogue box
ID ID Display the co-ordinate values of a point
LI or LS LIST Display information about objects in a text window
MASSPROP MASSPROP Calculate the region/mass properties of a solid
PR PROPERTIES Opens properties dialogue box
WHOHAS WHOHAS Displays who has a drawing open
XLIST XLIST Lists type/block name/layer name/color/linetype of a
nested object in a block or an xref

TIP

  1. If you wish to identify a known location use ID and enter coordinates on command line to mark that location with a node point – if you do not see anything try changing the node properties DDPTYPE.
  1. Alternatively set PDMODE to 3 to display an X at id point set PDMODE to 0 to clear.

LAYERS SHOURTCUT KEY LIST & COMMANDS USED IN AUTOCADE

SHORTCUT COMMAND COMMENT
LA LAYER Opens layer manager
LAYCUR LAYERCURRENT Change objects to current layer
LAYDEL LAYERDELETE Delete a layer by selecting object
LAYFRZ LAYERFREEZE Freeze a layer by selecting object
LAYISO LAYERISOLATE Isolates a layer by selecting object
LAYLCK LAYER LOOK Lock a layer by selecting object
LAYMCH PLAYER MATCH Match properties of a layer
LAYMRG LAYERMERGE Moves objects from the first layer to second and deletes first
LAYOFF LAYER OFF Switches a layer off
LAYON LAYER ON Switches all layers on except frozen layers
LAYERP LAYERPREVIOUS Restores previous layer state
LAYTHW LAYTHW Thaws all layers
LAYWALK LAYERWALK Walkthrough layers
LMAN LMAN Access Layer manager to save and restore layer states

TIP

Layer States – Create a layer state in Layer Manager (LA then Alt+S) to quickly switch between different layer property settings.

MODIFYING OBJECTS

SHORTCUT COMMAND COMMENT
AL ALIGN Align an object with another
AR ARRAY Make multiple copies of an object
BR BREAK Break a line by defining 2 points
CO or CP COPY Copy object
COPYTOLAYE COPYTOLAYER Copy object from one layer to another
R
CHA CHAMFER Chamfer between 2 non-parallel lines
E ERASE Erase selection
EX EXTEND Extend a line to meet another
F FILLET Draw an arc between 2 intersecting lines
G GROUP Opens object grouping dialogue – use to copy or move
LEN LENGTHEN Lengthen or shorten a line
M MOVE Move an object
MI MIRROR Mirror an object
MOCORO MOVE/COPY/ROTAT Copy move and rotate an object with one command
E
O OFFSET Offset an object by distance
RO ROTATE Rotate an object
S STRETCH Stretch an object
SC SCALE Scale an object
TR TRIM Trim objects
X EXPLODE Explode single entity to component parts

TIP

  1. When a grip point is selected cycle through command options using keyboard spacebar – sequence STRETCH, MOVE, ROTATE, SCALE, MIRROR.
  2. Switch between Group and Ungroup using CTRL+H, yes H!!

OBJECT SELECTION (use with editing commands)

SHORTCUT COMMAND COMMENT
An ADD Adds each successive object, switches from remove
ALL ALL All objects on thawed layers
CP POLYGON Objects touching or enclosed by selection polygon
C CROSSING Objects touched or enclosed by window – Move right to
left
F FENCE Objects touch by single selection fence
G GROUP Opens object grouping dialogue – use with copy/move/etc
L LAST Most recently created visible object
P PREVIOUS Most recent selection set
R REMOVE Objects to remove from selection set
SNAPANG SNAPANGLE Change the snap angle from default 0°
W WINDOW Objects enclosed by window – Move left to right
WP WPOLYGON Objects within a window polygon

TIP

  1. Use SHIFT+LEFT MOUSE BUTTON to deselect an object.
  1. When a grip point is selected cycle through command options using keyboard spacebar – sequence STRETCH, MOVE, ROTATE, SCALE, MIRROR.
  1. Object Cycling – hold down the Control key while picking, AutoCAD will cycle through all the objects that fall under the pick box as you continue to pick. When the correct object is highlighted, simply hit Enter. You don’t need to continue to hold down the Control key after the first pick.

OBJECT SNAP –  OSNAP

SHORTCUT COMMAND COMMENT
F3 OSNAP Switches snap on/off
F9 or CTRL+B SNAP Turns snap on/off
F11 or OSNAP TRACK Turns object snap tracking on/off
CTRL+W
APP APPARENT INT Apparent intersection of 2 objects
CEN CENof Snap to center point
DS DDOSNAP Opens drafting settings/object snap dialogue
END ENDPOINT Snap to end of line etc
EXT EXTENSION Extends lines beyond endpoint
FRO FROM Snap to an offset distance from an object snap
INS INSERTION Snap to insertion point of text or block
INT INTERSECTION Snap to intersection of lines, circles, arcs
MID MIDPOINT Snap to midpoint of line etc
MTP Snap midpoint between two points
NEA NEAREST Snap near to an object
NOD NODE Snap to point node
NON NONE Turns off object snap modes
PAR PARALLEL Continues a line parallel to existing
PER PERPENDICULAR Snap to perpendicular of line etc
QUA QUADRANT Snap quadrant of circle, arc, ellipse
TAN TANGENT Snap to tangent of circle, arc, ellipse
TK TRACK Locate points without drawing lines
TT TT Temporary tracking point

TIP

  1. Use TAB to cycle through Osnap points.
  2. SHIFT+RIGHT MOUSE BUTTON to reveal Osnap options

TEXT

SHORTCUT COMMAND COMMENT
%%C A+ Diameter dimensioning symbol
%%D ° Degrees symbol
%%O OVERSCORE Toggles overscore mode on/off
%%P ± Plus/minus symbol
%%U UNDERSCORE Toggles underscore on/off
CAD _003
DT DTEXT Single line dynamic text – Justify/Align to fit within text
line
ED DDEDIT Edit text
FIND FIND Opens find and replace dialogue box
JUSTIFYTEXT JUSTIFYTEXT Change the justification point without moving text
MIRRTEXT MIRRTEXT Mirrtext 0 to turn off
SCALETEXT SCALETEXT Scales text without moving the text insertion point
SPELL SPELLCHECK Performs spellcheck – ALL checks all text in drawing
ST STYLE Opens text style dialogue box
T or MT MTEXT Multiline/paragraph text
TCIRCLE TCIRCLE Places circle, slot, or rectangle around each selected text
object
TEXT DTEXT Single line dynamic text
TEXTFIT TEXTFIT Stretches/shrinks text by selecting new start and/or end
points
TORIENT TORIENT Rotates text, mtext, and attribute definition objects
TXT2MTXT TXT2MTXT Converts DTEXT to MTEXT
WIPEOUT WIPEOUT Masks part of drawing for clarity

TIPS

  1. To fit or align text in a defined area use DTEXT and select JUSTIFY/ALIGN or FIT – very useful if text is enclosed by a rectangle/ circle/etc.

NOTES

  1. Text entered in paperspace is 1:1, e.g. 5mm high text will print 5mm high.

THREE DIMENSIONAL – 3D

SHORTCUT COMMAND COMMENT
3D 3D Command line 3D solid options
BOX BOX Draw a cube
CYLINDER CYLINDER Draw a cylinder
DDUCS DDUCS Opens ucs dialogue
DDUCSP DDUCSP Opens ucs dialogue at orthographic tab
EXT EXTRUDE Extrude a face
IN INTERSECT Intersect an object
REV REVOLVE Revolves an object about an axis
RR RENDER Open render dialogue box
SE SECTION Section
SL SLICE Slice a solid
SU SUBTRACT Subtract selection from solid
TOR TORUS Draw torus shape
UC DDUCS Displays UCS manager dialogue box
UCS UCS UCS command line options
UNI UNION Union solids
VPORTS VPORTS Opens viewport dialogue box
WE WEDGE Draw a wedge

UCS

SHORTCUT COMMAND COMMENT
OB OBJECT Align UCS with an object, first select UCS
UC DDUCS Display UCS manager dialogue box
UCS UCS Universal co-ordinate system options
UCSICON UCSICON Change the UCS icon appearance
W WORLD Return to the WCS

VIEWPORTS

SHORTCUT COMMAND COMMENT
CTRL+R Cycle through viewports
CTRL+PAGE Switch up between layout tabs
UP
CTRL+PAGE Switch down between layout tabs
DOWN
DV DVIEW Perspective view.
MS MSPACE Switch to model space in a viewport
MV MVIEW Make a viewport in paper space
PS PSPACE Switch to paper space from viewport
VPORTS VPORTS Opens viewports dialogue box
-VPORTS -VPORTS Create a viewport using command line

TIP

  1. To prevent a viewport from editing right mouse click on the viewport and select DISPLAY LOCKED/YES
19-20699-11729209881

3D Structural Analysis and Design Software – STAAD.Pro – Bentley Shortcut Keys


Here are some shortcuts that will help you work like a pro with 3D Structural Analysis and Design Software – STAAD Pro – Bentley. Use these shortcut keys to save your time and speed up your work. further more can be available from staad pro manual.


Short Cut Keys

Shift + K : display node point

Shift + N : display node number

Shift + D : display dimension

Shift + S : display support

Shift + X : display sections

Shift + J : display references

Shift +M : display material

Shift + I : display axis at origin

Shift + B : display beam no.

Shift + G : display diagram information

Shift + A : display beam specification

Shift + O : display beam orientation

Shift + E : display beam ends

Shift + R : display releases

Shift + F : display floor loading

Shift + V : display load values

Shift + H : display wind load contributory area

Shift + Y : display floor load distribution

Shift + P : display plate no.

Shift + W : display wind load

Shift + C : display solid no.

Shift + T : display plate orientation

Ctrl + Shift + T : display surface orientation

Ctrl + Shift + P : display surface no.

Ctrl + Shift + M : display member no.

Ctrl + Shift +A : display axis window

Shift + L : display master slave

Ctrl + Shift + G : display design group

Ctrl + shift + B : display design brief

Ctrl + shift + E : display design envelope

Please share your reviews and suggestions with us in the comment box below!

staad pro commands list for Windows.